How to create a Neon account and use the mobile application
| Updated: |
(Disclosure: Some of the links below may be affiliate links)
I recently concluded that Neon is the best digital bank in Switzerland. The Neon account has very low fees. And they have an excellent mobile application with all the necessary features. And everything is available in English. These features make it a perfect fit for most people. Neon is the best bank for my audience.
This article will walk you through creating an account with Neon. I will go through all the account creation steps with screenshots and explanations. It is a straightforward process that should not take you more than 10 to 15 minutes.
After this, we see the main features of the mobile application.
Neon
All the services you need to pay, save and invest, in a neat package, with extremely good prices!
Use code tpsummer to get one year of Neon Plus and your debit card for free!
- Invest with great fees
Neon is an entirely digital bank in Switzerland. It is a rather new actor in the banking industry. Its main advantage is that it does not have management fees. Moreover, their application is also straightforward to use.
Neon is not a bank since they do not have a banking license. However, your money is held by the Hypothekarbank Lenzburg Bank. Therefore, your money is protected up to 100’000 CHF according to Swiss law.
If you use it correctly, it will be entirely free. For this, you need to limit yourself to no more than two withdrawals per month. Used correctly, Neon is the best Swiss bank you can have!
There is no more reason to pay for a bank account.
To learn more about Neon, read my full review of the Neon Bank.
If you want to learn more about Neon from another person, I have interviewed Neon’s founder, Julius Kirscheneder.
Create a Neon Account
So, we can get started with our Neon Account creation!
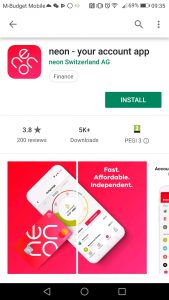
The first step is to install the Neon mobile application if you have not done so already. The app is available on both Android and iPhone. All my examples are made with an Android. But there should not be many differences between Android and iPhone.
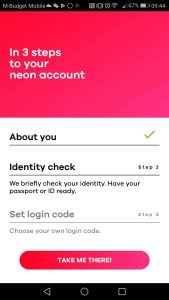
1. Personal Information
Once you are done installing, you can start the app and start the account creation process. There is nothing complicated about the entire process. It begins with filling in your personal information as usual.
They will ask you all the information you can expect: names, addresses, phone, and email. You must also enter your place of origin, nationality, and civil status. These questions are standard information for all banks in Switzerland.
Ensure you enter your email correctly. They will ask you to confirm it. You will receive a code by email and must use it during the application process.
If you open a Neon account, please use the code "tpsummer" during the registration process, and you will receive 1 free year of Neon Plus and your debit card for free (20 CHF value). And I will also receive 15 CHF.
After you enter the voucher (thank you!), you must answer a few legal questions. Once again, there is nothing special here; it is just standard banking stuff. They will ask you if you are only taxable in Switzerland and the owner of the assets you will deposit in this account.
After this, you will have to accept the terms and conditions.
2. Identity Verification
The second part of the process is to verify your information. With a standard bank, you must show your ID to the clerk. But here, there is no clerk. So they rely on online verification with a video call.

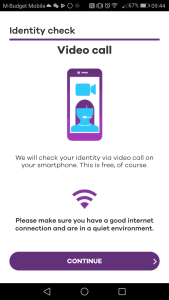
Be sure you have your ID ready and some time and a quiet place before you start. Once you begin the process, it will put you in a queue to check your account.
I called on a Saturday, and there was only one person in front of me in the line. I waited less than two minutes. This activation system is an excellent service. You may have to wait longer if you do this during the week.
The entire conversation was in English. It went well with no issues. First, the person will ask your name. And then, you will be asked to hold still for a picture.
Then, you will have to show your ID to the camera. This procedure works well because they can use the back camera as well. It is a well-thought process. You will have to show both sides. And they even asked to tilt it so they could see the security features of the card. It is very professional.
Finally, you can request a code during the call. They will send you an SMS with a code. Once you have received it, you can enter it during the call.
As soon as you enter the code, the person will tell you that everything is in order. At that point, the call will end, and you will be back in the application, ready to proceed to the next step of the process.
I was pleasantly surprised by this process. It is the smoothest identity verification method that I have ever seen. The fact that there is an actual person during the process makes it much better.
3. Set Login Code
The last step is straightforward once you have gone through the entire process.
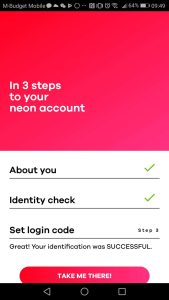
You have to choose a login code of 6 digits as the code for your account. Make sure to choose something that people cannot find easily. For instance, you should never use your birthday as a code. It is one of the worst passwords ever. And also, do not use a sequence of 6 times the same digit.
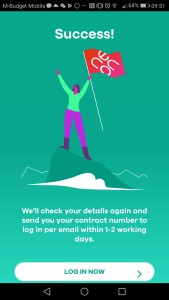
Once you have chosen your login code, enter it and validate it. Then, repeat the password once again and confirm. You have to wait until Neon creates your account and sends it to you. You cannot log in to the application for now since you need your contract number.
Use the application
Once you have received your account number, you can start using the app. Since the application is your bank account, you now have access to everything you want to do.
It took about two working days for me to receive my contract number by email. For the Neon card, you will have to wait longer. But you do not need a physical card to get started. You should expect to receive the card and the PIN on two different days in the mail. This process is always how they deliver bank cards.
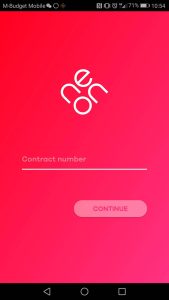
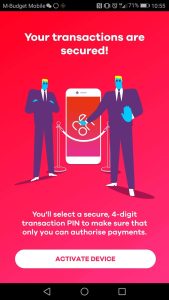
Now that you have the code, you can log into the application. Your contract number is your login. And you will use the password that you set during the application process. The first time you do that, you must validate your device by entering a second code local to this device. If you install the Neon application on several devices, you should use a different code for each.
View transactions
The first thing you can do is see your balance and view your transactions. This information is directly in the first view of the Neon application. Or you can go to Transactions, and you will see both your balance and all the transactions.
As you can see, for now, my account is pretty empty since I took these screenshots just after transferring a little money from my other bank account.
Payments
The second thing you can do, and probably the one you will use the most, is the ability to make payments from the application.
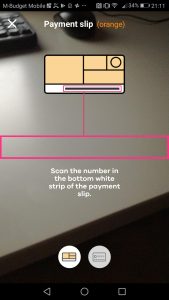
There are two ways to do that: manually or by scanning a payment slip. If you have a bill, you want to scan the information line instead of writing everything down manually. Scanning a bill will save you a lot of time.
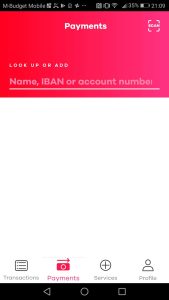
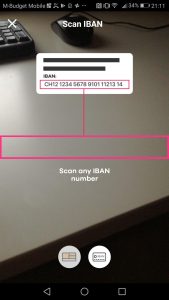
For the automated way, go into the Payments tab and use the Scan button on the top right corner to scan a bill. You must align the scanning line with the coding line on the bill. It works well. And if you want, you can also scan an IBAN on paper if you do not have a bill. You can even scan a QR code if you have such a bill.
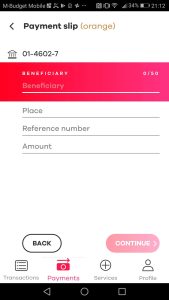
If you want or need to enter the information manually, you can start by entering the IBAN or the account number from the Payments tab. From there, you will have to enter all the information manually. It is pretty straightforward, and it is precisely the same procedure as all the other banking applications.
Other features
There are a few other features in the application as well.
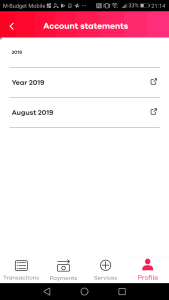
You can generate a PDF account statement from the Profile menu. You can make one account statement monthly or year for all the time you have used Neon.
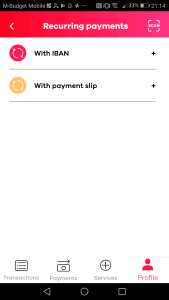
You can also define some recurring payments. These are payments that will be automatically executed at a set time. Once again, you can do this either by scanning a bill or manually entering all the information.
Finally, you can also obtain all your banking details. This information can be convenient if you need someone else to deposit money into your account. You can find all this under Profile -> Banking Information.
Conclusion
The Neon application does not have many features, but this is an advantage rather than a problem. Most people do not need many features, and you do not need anything fancy with your bank account.
I do not think people should automate their finances or need fancy budgeting apps.
The Neon bank account is the best digital bank account available in Switzerland currently. It has all the features people need, and it is entirely free if you use it correctly.
If you open a Neon account, please use the code "tpsummer" during the registration process, and you will receive 1 free year of Neon Plus and your debit card for free (20 CHF value). And I will also receive 15 CHF.
If you want more options, you can read about the best Banks in Switzerland.
Do you have a Neon account? What do you think of Neon? And what did you think about the Neon application?
More reading

Zak Review 2026: Free Bank Account from Bank Cler
Is Zak the best bank? Read our 2026 review of Zak by Bank Cler, the first Swiss mobile bank, and see how its features and fees compare.
PostFinance Bank Review 2026 – Pros & Cons
Still a good bank? Read our 2026 review of PostFinance. We analyze their new fees and app to see if they are still a competitive option in Switzerland.
Neon Bank Review 2026: A Great Swiss Digital Bank
Is Neon the best bank? Read our 2026 review of Neon, the free Swiss digital bank, and discover why it is the top choice for frugal people.
Learn easy ways to optimize your finances and save thousands in Switzerland with our exclusive e-book. Learn about the most cost-effective financial services tailored for savvy residents and expats!
Get Your FREE Swiss Money-Saving Guide
Hi Claudio
Can you confirm your code for Neon? I entered poorswiss code but seems like it is not working. Thanks for the review!
Hi lulu
Sorry to hear that. My code is indeed poorswiss. What makes you say it’s not working?
Hello Baptist,
Thank you for your document. Well detailed.
I am French living in Sweden. I saw that Neon has interesting saving plans : investment in shares or funds or crypto?
Can you please tell me more about it?
Many thanks
Lisa
Hi Lisa,
I have talked about this service here: Neon Invest Review 2024: Pros & Cons
Unfortunately, it’s not opened to people outside of Switzerland.
Thank you a lot for all the in-depth analysis and sharing of information you provide here. Helps a lot for a foreigner moving to Switzerland. All the best!
I am glad you like it!
Thanks for the article !
I have a question though, I’m currently moving to Switzerland and looking for an apartment. I will stay for a few weeks at a friend’s place while doing so and I was wondering if I could use his address to open a neon bank account. I would then update my address in the app when I move to my own apartment. Do you think I can legally do that or is it risky for me or my friend ?
The tricky part being that I need an address to open the bank account and I need to open a bank account to get an address so I feel stuck
Hi Aurora,
I am definitely no lawyer, so this is not legal advice :)
I believe this is correct since you are effectively living in Switzerland and your friend is aware of you using his address. One thing you may want to do is add a note on the mailbox that you are living here so that the neon activation letter finds you there.
Then, once you are settled into the new appartment, you’ll need to update the address in Neon.
In theory, you should also declare yourself to the county that you are living in your friend’s address.
Thanks for stopping by!
After going through great pains to open a Neon account, they eventually told me that if I pay taxes in two countries (Switzerland and India), I am ineligible to have an account with them.
Hi Tejaswi,
I am sorry to hear that. But it is mentioned in their FAQ that they only accept customers paying taxes exclusively in Switzerland.
Maybe, they will change that in the future.
Thanks for stopping by!
Thanks for the post. For me neon is only missing the ebill. I don’t have automatic débits but still makes it much easier to get the invoices there and just need to validate. Any idea of if and when they will get ebill?
Hi Luis,
You’re welcome.
I do not know when it will be done. But I know that they are working on it and that it is one of their priority features to release. It should come soon, but I do not have more details.
What’s your current bank account if you don’t mind me asking?
Thanks for stopping by!