How to Build a Nice DIY Shoe Rack for 35$
| Updated: |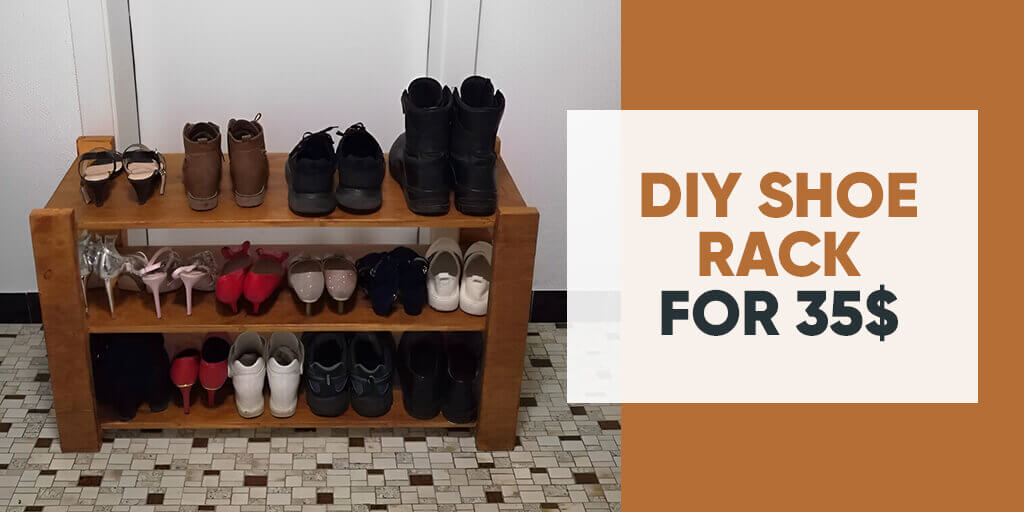
(Disclosure: Some of the links below may be affiliate links)
I have finally been able to do my second Do-It-Yourself (DIY) furniture. I have built a nice shoe rack. And I managed to keep it on a friendly budget! I wanted to do this project for a long time now. But either I did not find the time or our budget was too bad to afford this. It is not a high price. But I did not want to make some months even worse than they already were.
But finally, here it is! Four months after our DIY bookshelf project, I have been able to build my second DIY furniture. Since Mrs. The Poor Swiss joined me in Switzerland, the number of shoes in our apartment exploded. I have only three pairs of shoes for the entire year. But Mrs. The Poor Swiss already has about ten pairs! So we needed a new shoe rack. And I wanted to build it myself!
I managed to build a nice enough shoe rack for about 35 dollars. For the size of it and the look of it, I think it is an excellent price. But I will let you judge. Remember that I am no expert in wood or furniture making! I am just starting with woodworking. So if you have any advice for me, I would appreciate it!
The shoe rack project
The idea of the project was simple: Build a three layers shoe rack. I made plans myself, but I got a lot of inspiration from many (too many) DIY YouTube videos. I went for a one-meter wide shoe rack. It is quite wide. But I wanted something that could handle all our shoes and last in the future once we have children. Once again, I will go with a wood stain for the finishing.
There is one thing I wanted to do differently on this DIY project. For the first project, we used visible screws. It is not a big deal since they are well hidden with the stain now. However, I wanted to avoid this for this project. So I wanted to use pocket holes to hide them. I never used this before, so it is yet another reason to try it.
Here is the list of the wood pieces I needed on my final plan:
- Side pieces (4x): 8cm x 60cm x 2.4cm (3.14″ x 23.62″ x 0.94″)
- Support pieces (6x): 8cm x 30 cm x 2.4cm (3.14″ x 11.81″ x 0.94″)
- Boards (3x): 100cm x 30cm x 1.8cm (39.37″ x 11.81″ x 0.7″)
You can very easily change the dimensions of the shoe rack. The thickness of the different pieces is not essential. I used thicker wood for the side pieces and the support pieces. I think it looks better and more sturdy. But it would probably be okay with 1.8 centimeters as well. You can make it wider or narrower, only be changing the dimensions of the rack. Since I have big shoes, I made it 30 centimeters deep. You can easily make it 20 or 25 centimeters if you want. You can also make it higher and with more layers, if you wish. It is straightforward to change how you do it! That is what is great with building DIY furniture.
If you want to make it simpler, you can get rid of the support pieces. I think it looks more beautiful that way. But it can still be quite strong without it. I was a bit afraid that the pocket hole drilling needed something thicker than 18 millimeters. I will try in another project to drill pocket holes in 18 millimeters wood and see how it goes.
And if you do not want to use pocket holes, there is an easy solution. You can screw the support pieces from the side pieces directly. Doing so will be very strong too.
The price
Once again, I went to Bauhaus to buy the wood I needed for this project. I also bought some wood stain to make a beautiful finish. I am happy with my shopping at Bauhaus. It is reasonably priced, and they are always great to answer my dumb questions. Here is all I bought for this project:
- 2x spruce wood 2000mm x 300mm x 18mm (I only need 3000mm out of 4000mm): 15 CHF
- Wood Stain: 7.50 CHF
- 2x Spruce wood around 600mm x 500mm x 24mm (I picked them out of the pile of discarded small cuts): 12 CHF
That gives us a total of 34.50 CHF for the shoe rack. Let’s say it is a 35 dollar shoe rack!

If you want to make it cheaper, you can remove the wood stain. It is only to make it nicer. If your shoe rack is not visible, there is no point in making it look very nice! You can also make it 5 CHF cheaper if you remove one layer of shoes. And if you make a narrower one, you can also make it more affordable. The advantage when you create a piece of furniture yourself is that you are free to do what you want!
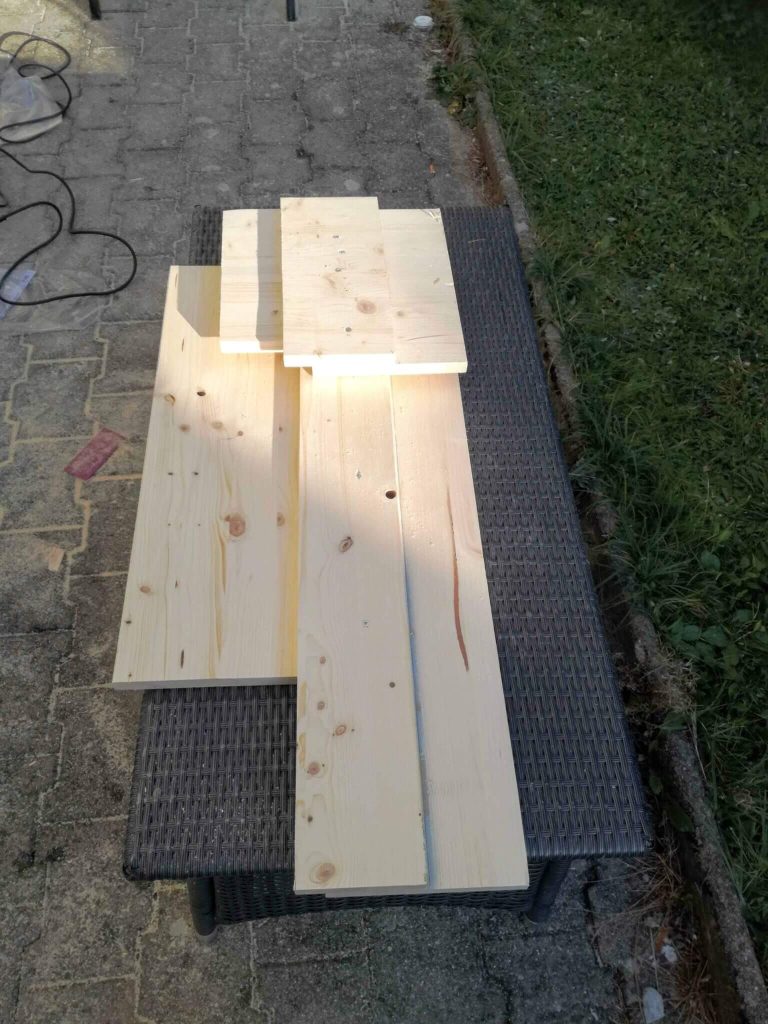
The cutting
The first step is obviously to cut everything into the final pieces. I used a circular saw for this. But you can use an orbital jigsaw, I think. If you have a table saw, it will be much easier, of course.
When I was building my bookshelf, I had a hard time cutting straight and regular with the circular saw. So before this project, I decided to make some guides for the circular saw. A guide is a simple wood assembly on which you put the circular saw, and you know exactly where it will be cutting. I made two guides, a short one of 30 centimeters and a long one of about 80 centimeters.
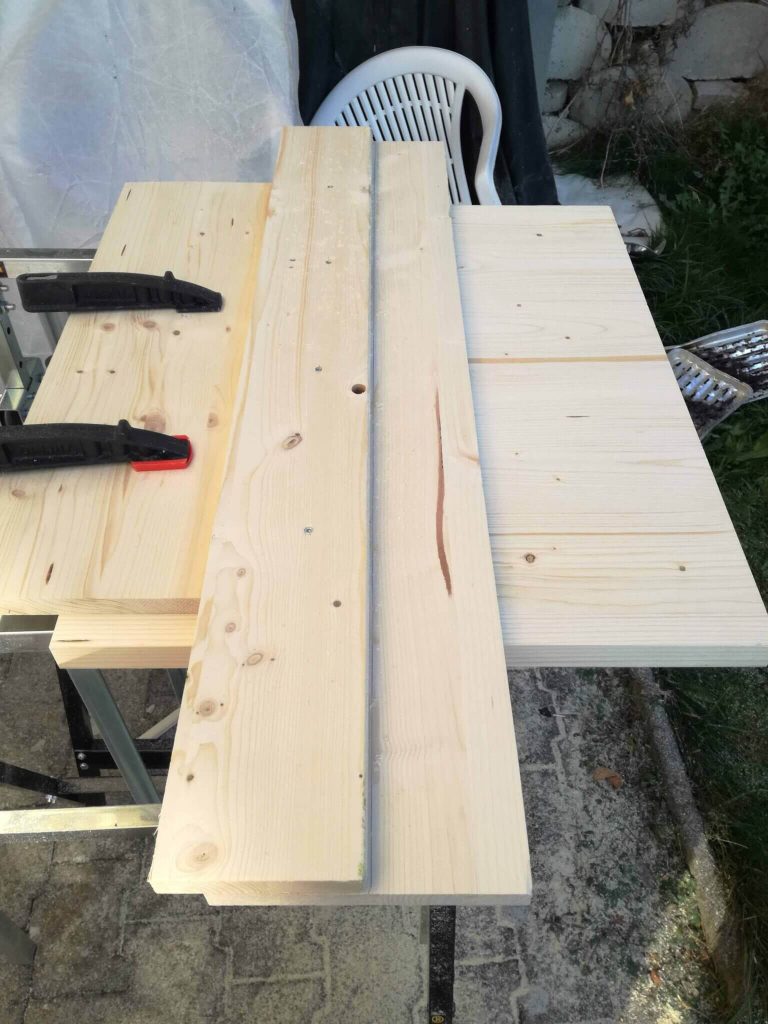
These two guides made the cutting of all the pieces so much easier! It took me much more time to build the guides than to build all the other parts! My cutting is still not entirely perfect. Sometimes I had a hard time clamping the guide correctly to the piece. But it is already much better than last time.
Here are all the pieces after they have been cut to the correct sizes:
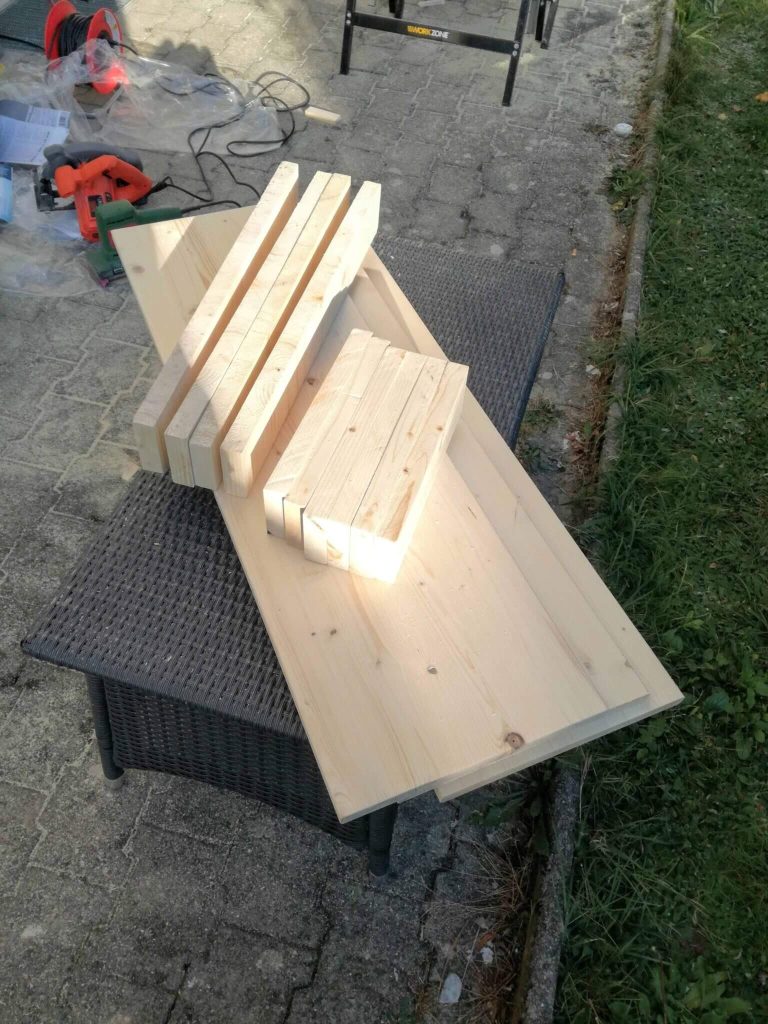
The result of the cutting is much better than on my previous project.
The sanding
The next step is to sand your pieces. I sanded all the support pieces with 100 grit. Then, I sanded the boards and the side pieces with 100 grit and then finished with 120 grit. Finally, I sanded all the edges thoroughly to make it smooth.
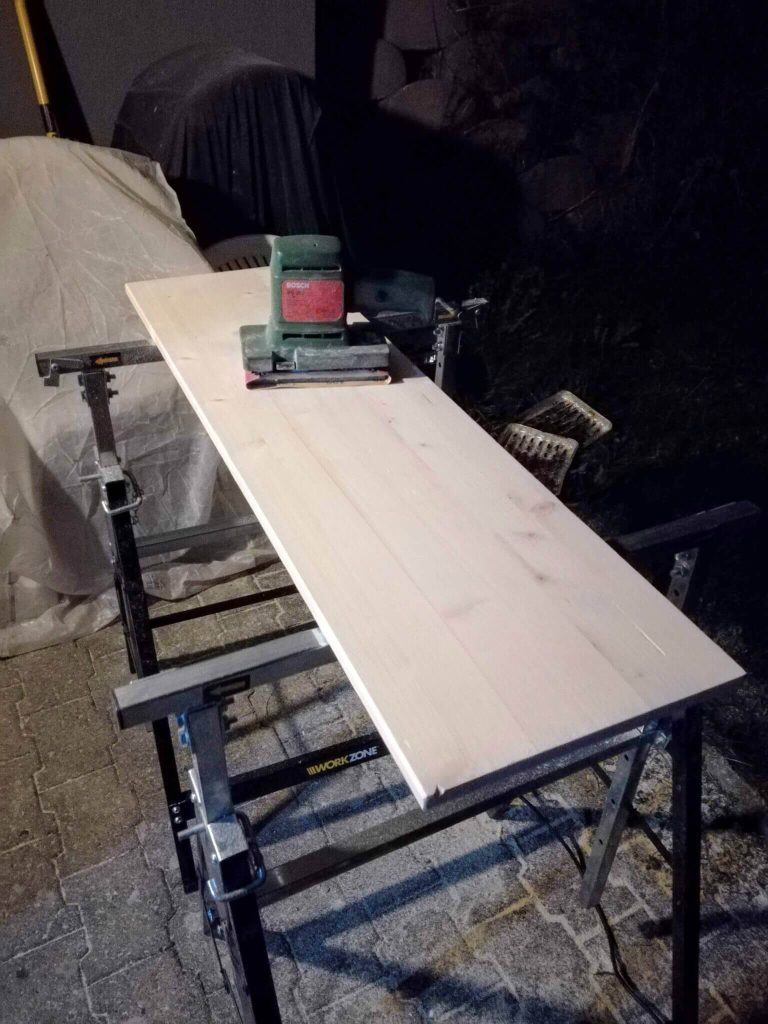
To be honest, this step is optional for this project. Since this is a shoe rack, it is not very important to sand every piece. Your shoes will probably not feel the differences. However, if you do not sand every piece, I would still recommend to sand down the edges of the support pieces. These pieces will be on the floor and can easily chip. Just sanding down the edges will prevent that.
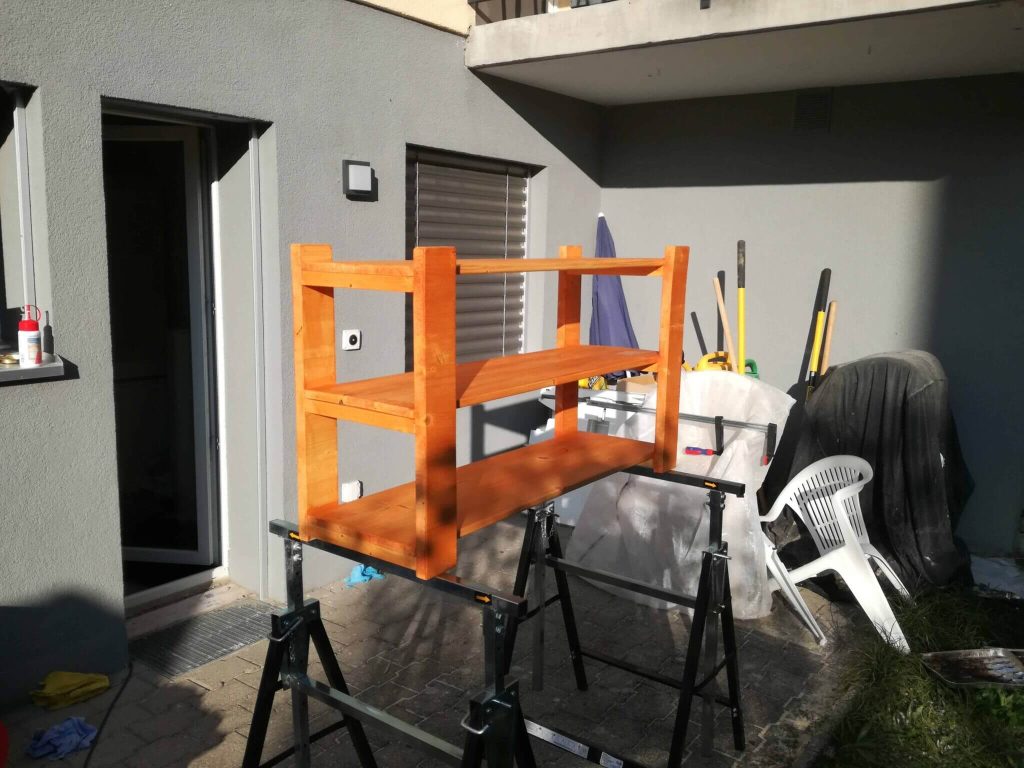
Assembly of the sides
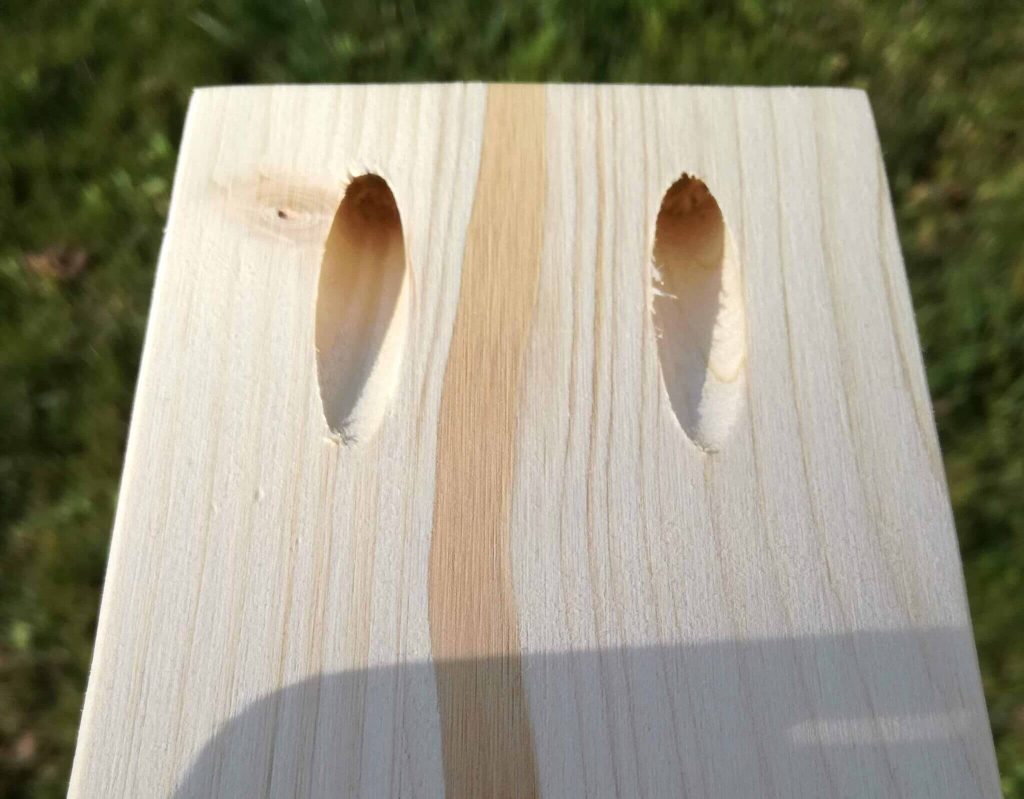
The next step is to assemble the sides. For this, I used pocket holes under the support pieces. I made two pocket holes in each support piece. It was the first time I ever made pocket holes. I had to experiment with them before I started on the real parts. It is not difficult to use. But you need to find a way to clamp it well to the wood. For me, it was a bit difficult since I do not have a work table. I managed to do it.
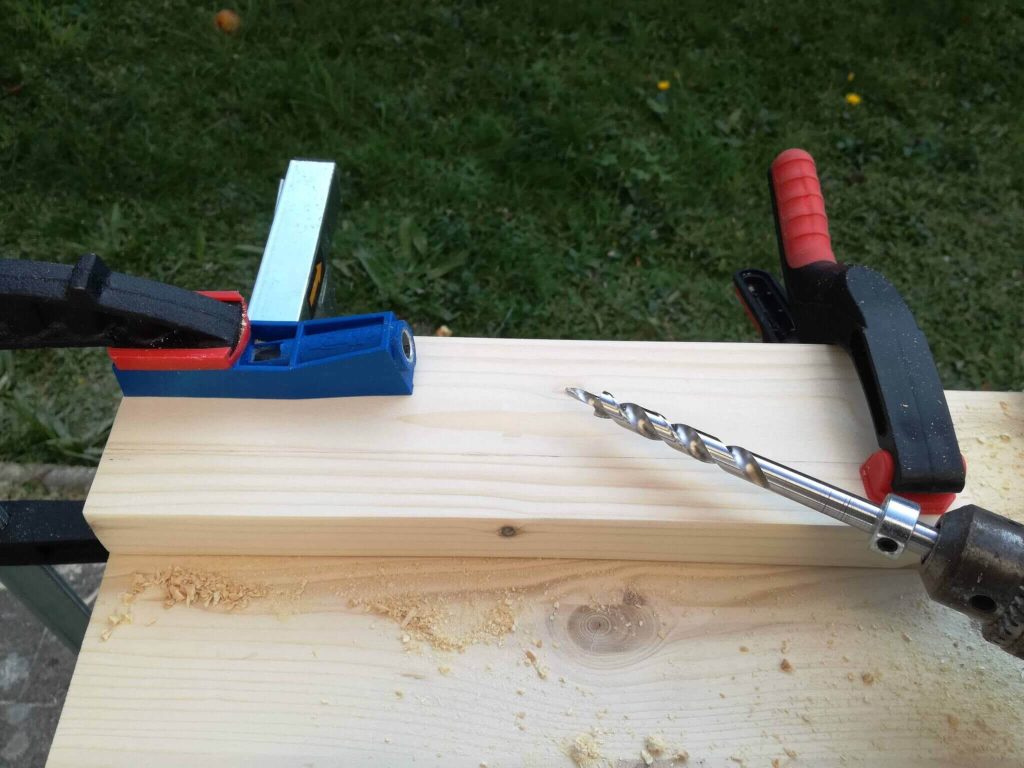
As you can see, I am a bit limited for space. But it still ended up quite good. The first time took quite some time. But then, the next five ones were much easier. Here is one of sides pieces with two of its four pocket holes:
Once you have two pocket holes in each of the support pieces, it is time to assemble the two sides of the shoe rack. For the screwing, I did a small drill as a guide into the side pieces. I also used glue since we had some from the previous project. I am not sure glue is necessary since we already have four screws for each support piece. But it does not hurt ;)
I do not know what is the ideal order of operations here. I started with one side piece and screwed the two external support pieces in. Then, I put the other side piece on top and screwed it too. But I am not sure it is necessary. I had to screw everything by hand because my electric screwdriver is too big for this. It exists some angle for the screwdriver, but I do not have one. So I used a good old screwdriver. Once I did that for both side pieces, I added the middle one.
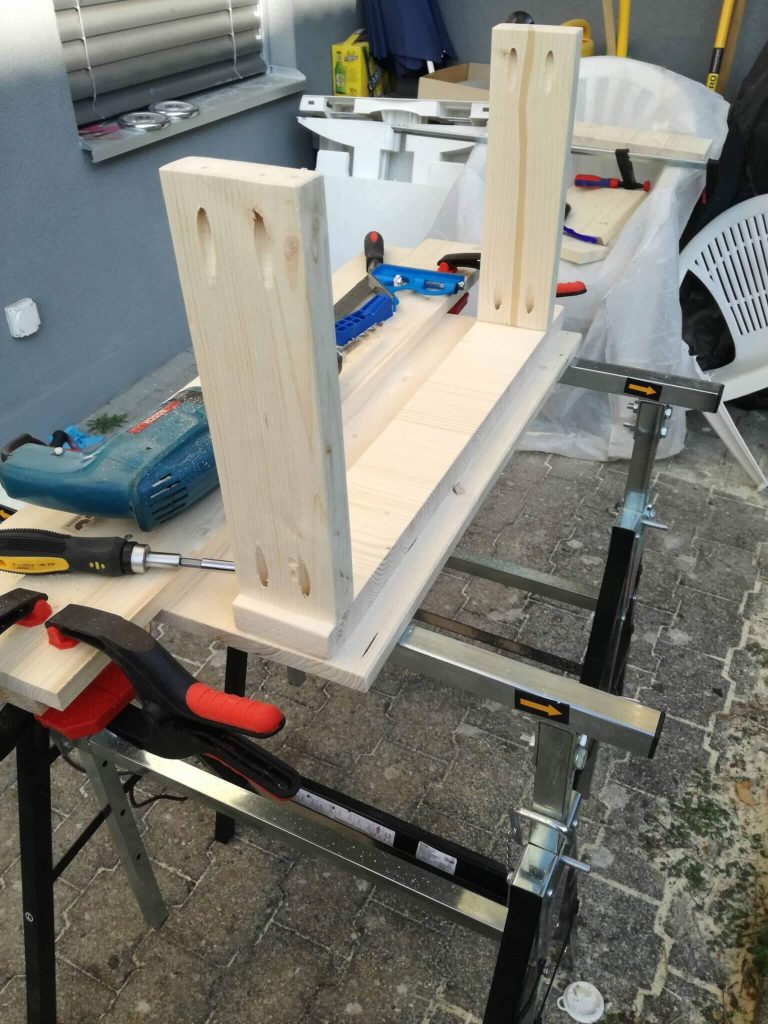
In the end, it does look quite good and very sturdy.
Final assembly
Now that the two side pieces are assembled, it is time to add the boards. At first, I thought of screwing them from below. But once I put them in place, they fitted quite firmly. So I ended up only gluing them in place. If yours fit less strongly in place, do not hesitate to screw them. It would go fine.
There is one technique that could be useful if you do not know it. If you need to put the boards into place, do not use a hammer directly onto it. It risks breaking or making a mark into the wood. Instead, use another small piece of wood between the hammer and the board. It will help a lot.
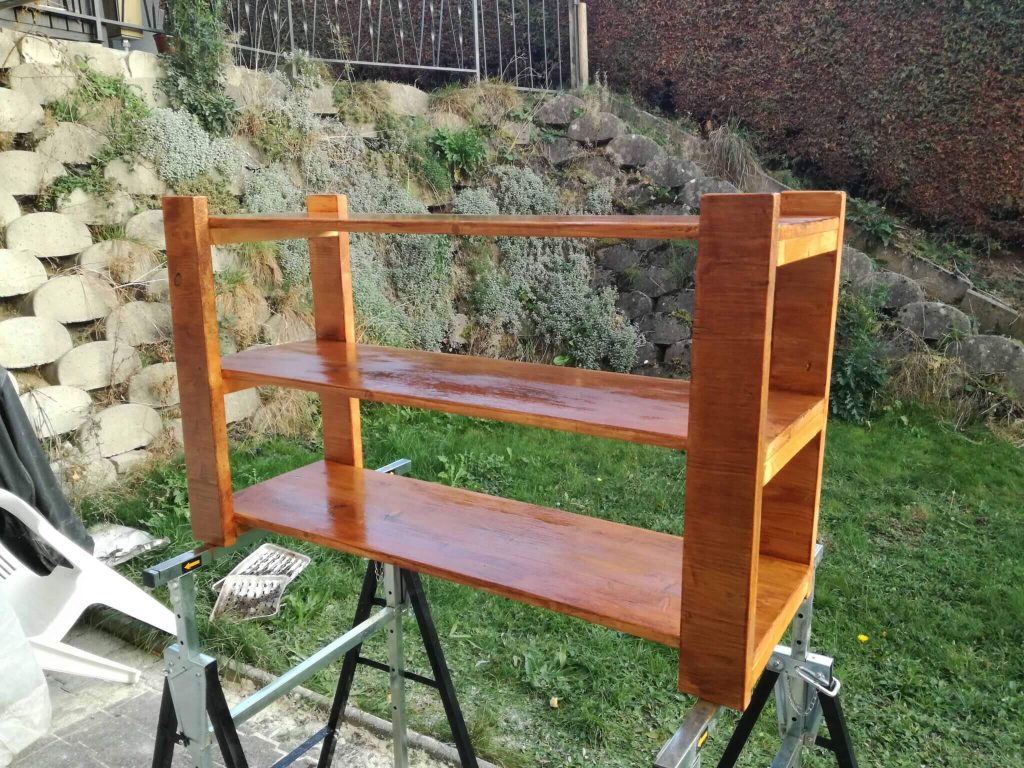
The finishing
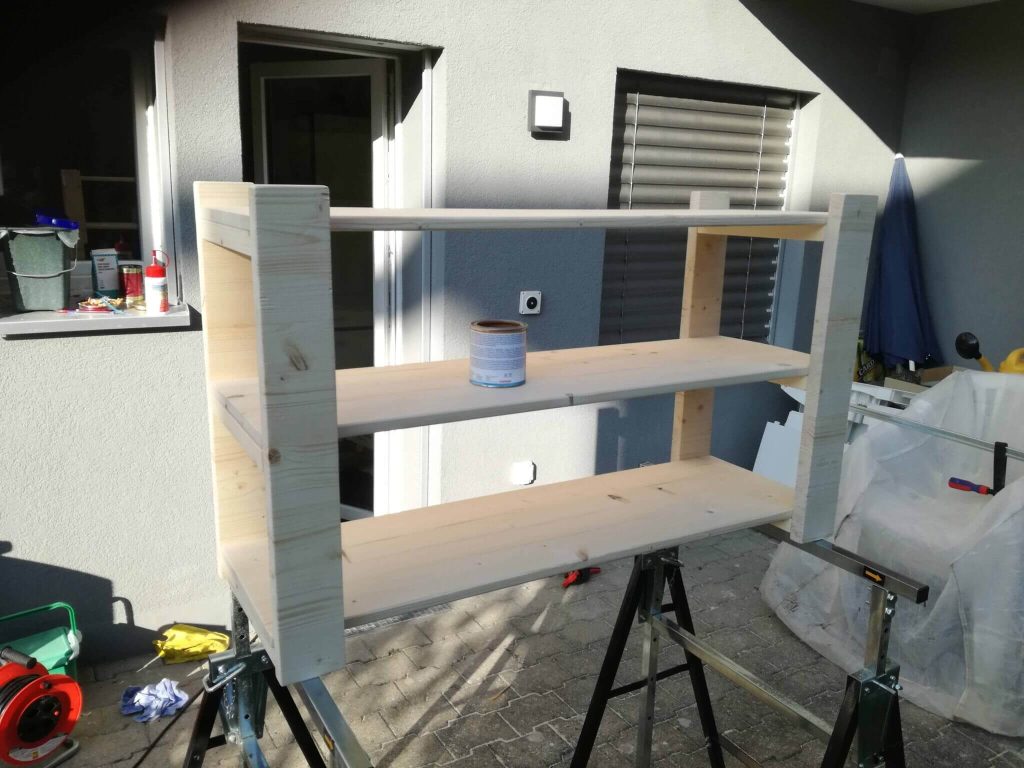
The last step was to paint it. As I said before, it is not necessary for a shoe rack. But I wanted it to look nicer. We did not paint it. But we used a stain. I like the look a real wood. We chose a bit darker stain than last. But this time, it is a water-based stain, unlike last time. It dries very fast, especially in the sun. But you need to apply more layers. Here it is after the first layer.
We wanted to apply two layers in total. But since there was a bit more stain at the end, we applied the third layer. In the end, it looks terrific. I wanted something darker, but I am still pleased with the result.
Lessons learned
The biggest lesson I learned with this project is that using guides for the circular saw is helping a lot! For this project, I build two guides for the saw. And only for a straightforward project, it is already worth it. It is quite simple to make, but so helpful!
Another thing I learned is to always well mix stain before using it! We forgot to do it this time, and we had different colors on different layers of the stain can. Fortunately, this did not turn out bad with the multiple layers. But this is something I will remember next time!
During this project, I realized that working with small pieces of wood is not the same as working with big pieces. Last time I almost only worked with only pieces of at least 60 centimeters. I had some issues with my clamp. I was not able to clamp them well and then still use my drill or other tools.
The previous problem is linked to the fact that I do not have a work table. The problem is not getting a work table. I could either build one or find a used one for a little price somewhere. The problem is that I would not know where to put it. I do not have any place inside for a workspace with a large work table. And outside, there is not enough place that is not under rain where I could install it.
I am thinking of building something outside so that I would have a place covered. But since I am renting, it may not go well with the owner. I still have to think about it. Another solution is simply to buy a large piece of wood and put it on the saw-horse and clamp it down. That way, I could work on top of it.
Conclusion
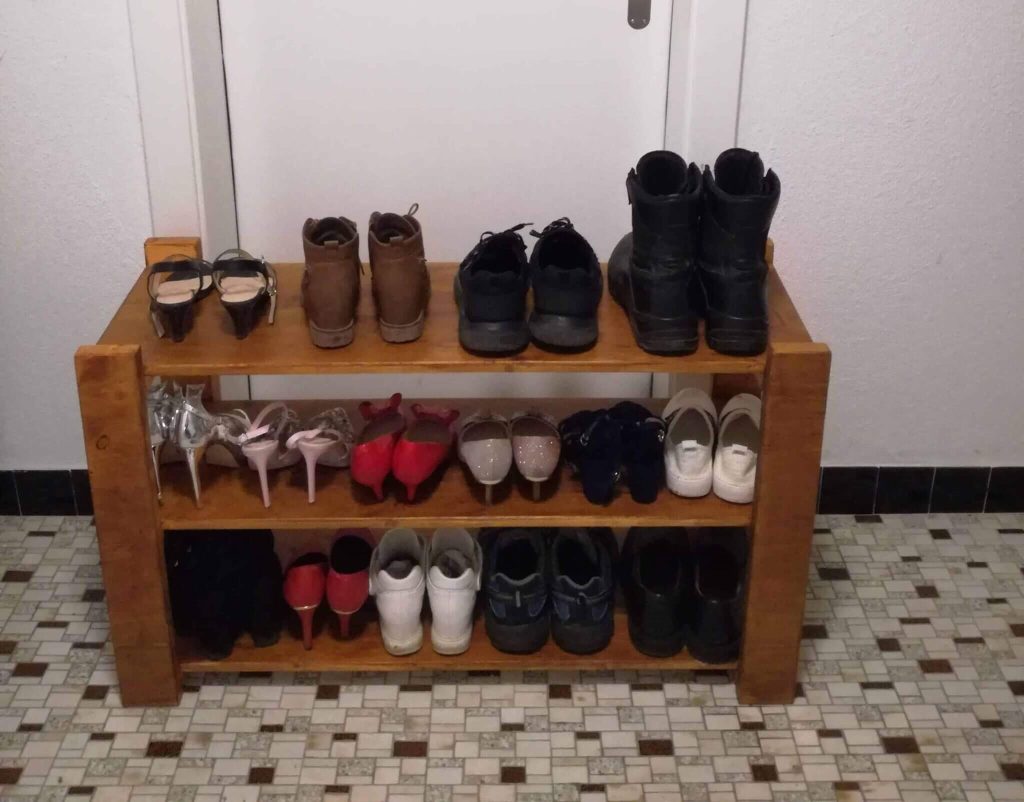
It is not very difficult to build a lovely shoe rack for about 35 CHF. As a bonus, this time, there are no visible screws. I think this is a great addition. I think it is still an easy project. It did not take me too much time to finish it. If you are already familiar with a circular saw and with pocket hole drilling, you will save a lot of time!
I enjoyed working on this project. For the future, I still have many DIY projects. I am not yet sure what the next project will be. But I think it will be a simple bench for outside. A bench is a straightforward project but needs strong wood. I will see if I can manage to make it cheap. In the meantime, I will still watch many DIY videos on YouTube. I am sure this will give me (too) many ideas!
If you liked this project, you would like the other DIY project where we built a wood bookshelf.
What do you think of our new shoe rack? Do you have any DIY projects yourself?
More reading

11 Tips to Save Money Sustainably
Save green. Discover practical tips to save money while living sustainably. Protect the planet and your wallet at the same time.
How to raise a baby frugally in Switzerland with Mama Bear Finance
Kids don't have to be expensive. Discover practical tips to raise a baby frugally in Switzerland without sacrificing safety or happiness.
How To Save Money with a Vegetable Garden
Find out how we saved money by growing food in our vegetable garden! Discover what we have learned!
Learn easy ways to optimize your finances and save thousands in Switzerland with our exclusive e-book. Learn about the most cost-effective financial services tailored for savvy residents and expats!
Get Your FREE Swiss Money-Saving Guide