How To Build a DIY Bookshelf for 65$
| Updated: |(Disclosure: Some of the links below may be affiliate links)
I always liked to build things myself. I had always wanted to buy a Do-It-Yourself (DIY) furniture myself. At first, I wanted to do it principally for fun. But I also wanted to save money on buying new furniture. Since we needed a new bookshelf for our living room, we decided to build a bookshelf ourselves.
We did it with Mrs. The Poor Swiss. None of us is an expert and it is our first DIY furniture. I am reasonably handy in general. And I built a few things with wood when I was a kid. But that was a long time ago. For this project, I watched a lot of DIY videos on Youtube and it taught me a lot. But that is all the experience I have. If you have advice for us, do not hesitate to let us know! Ultimately, we still managed to build something quite nice for our experience!
In this article, I will review all the steps necessary to build this project. And since it is a finance blog, I will also go over the costs of building the wood bookshelf by ourselves.
The project
At first, I wanted to build something big. My first idea was to build a 120 centimeters (47 inches) wide bookshelf and two meters high (78 inches). But I realized that it was a bit too big to start with. Moreover, it was not very smart. I was planning to replace our existing bookshelf with this big bookshelf.
So we decided to build a smaller bookshelf of 60 centimeters (23 inches) wide and two meters high. Like this, we will keep both small bookshelves. We decided to go for 30 centimeters deep. Finally, we decided to have 6 boards on our bookshelf. We did the plan on paper only. We hesitated a bit between paint or a simple wood stain. Finally, we decided on a wood stain.
So now, we had to do the shopping. We needed the wood, some wood glue, and some wood stain. I already had most of the necessary tools. I am a tools geek. In fact, I really like tools. It is something I cannot really explain. We borrowed a good cordless drill from a friend. We did not have to buy any tools for this project. After a long research for the cheapest place for the wood, we ended up shopping at Bauhaus. It was cheaper than other local shops. Hornbach was also very cheap but it was too far away from our apartment to consider.
Here is the wood we bought for our project:
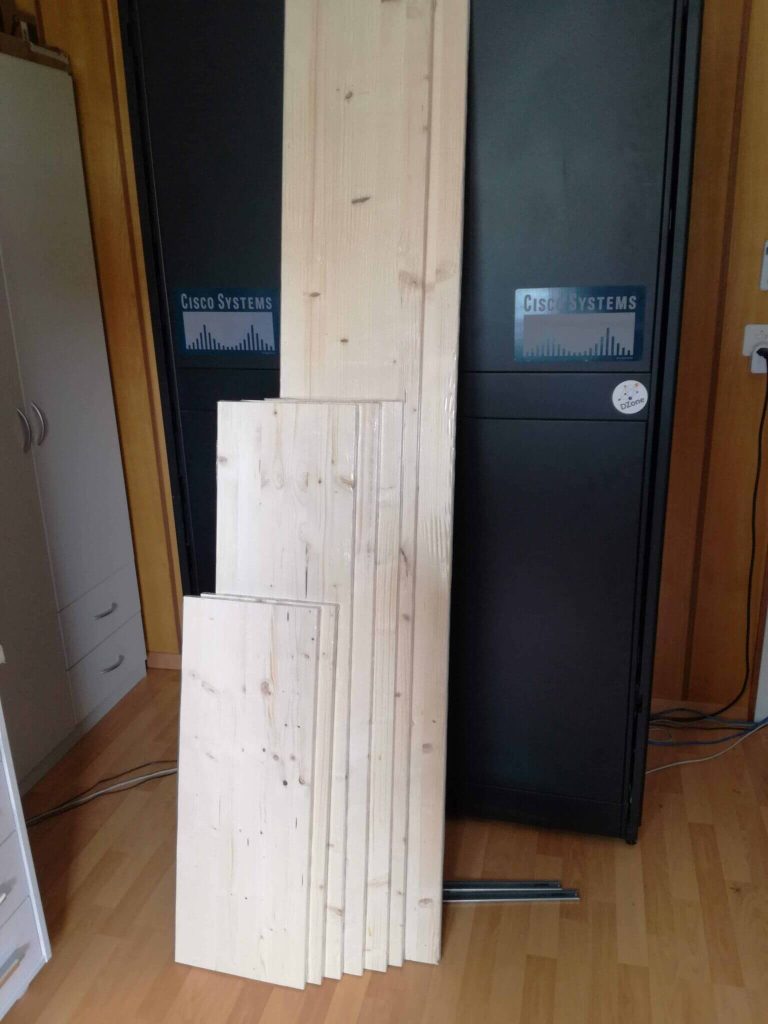
As for the tools, here is what we used:
- Circular Saw
- Hand tool for sanding
- Electric drill/screwdriver
- Clamps
- “Workplace”
- Ruler
- Level
The cutting
The first big step was to cut the boards. We bought 120 cm by 30 cm wood boards. We had to cut them in 60 cm to make our planned bookshelf. For this, I used a circular saw. Here is my workplace:
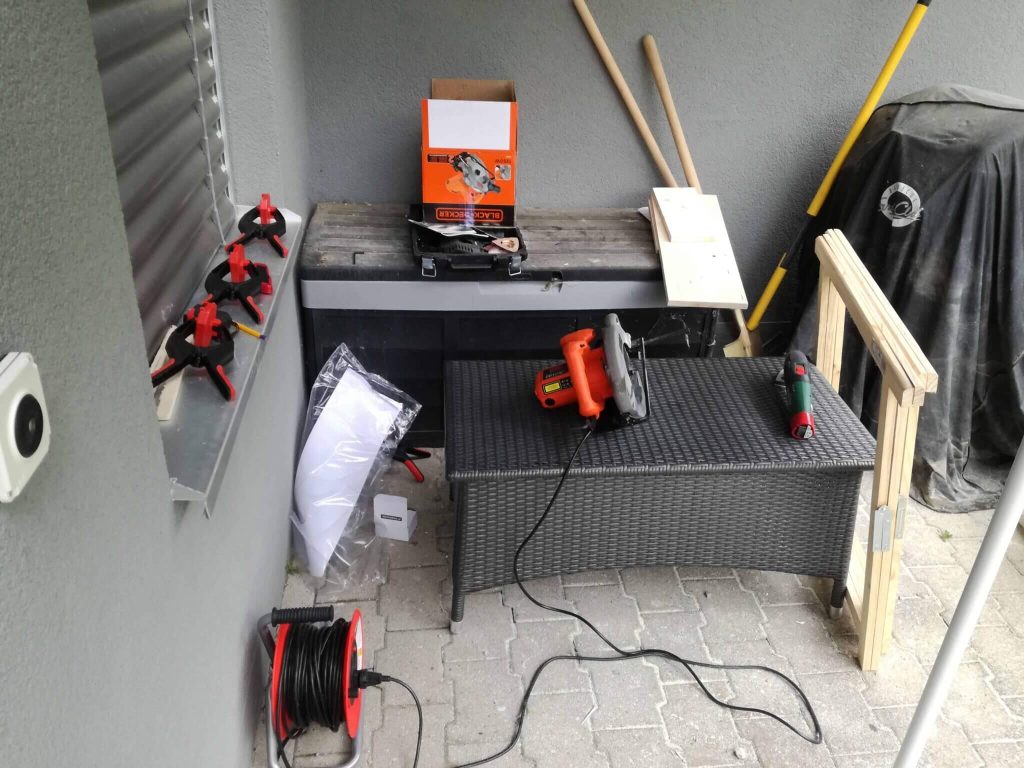
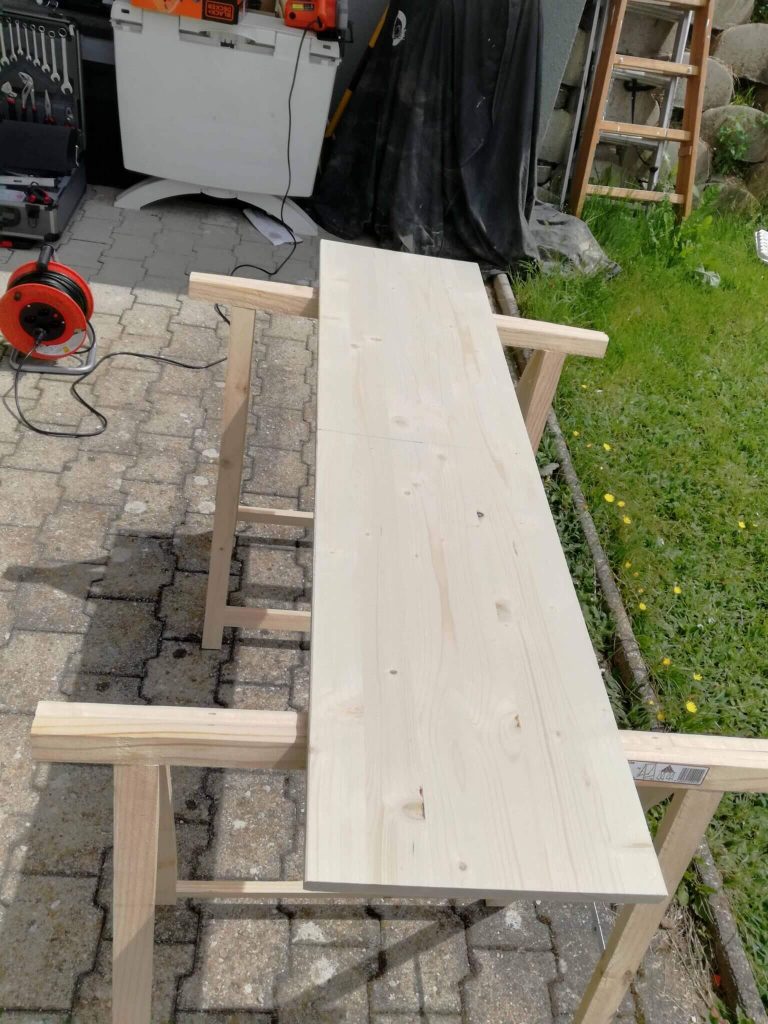
We do not have a big enough cellar to work inside, so we decided to make the biggest parts outside. We waited for a sunny day for this. I had a few issues with this. This was the first time I was using a circular saw. It turned out that the indicator for the cut was not aligned to the blade. So the first cut was totally out-of-place.
After this, I simply looked at the blade to see where it was cutting and ended up with better cuts for the last two boards. I somehow fixed the boards with more cuts for the big errors. I used the sanding machine to fix the small errors. It was a bit of a mess. But in the end, I had my 6 boards.
And then, I had to do two small (4-5 centimeters) pieces for the below. For this, I could use the parallel guide on the circular saw. So it ended up much better. That is all I had to cut for this project. If you have a table saw, it will be much easier.
The assembly
The next step was to assemble all the pieces together. We started with the bottom board and the two small pieces underneath:
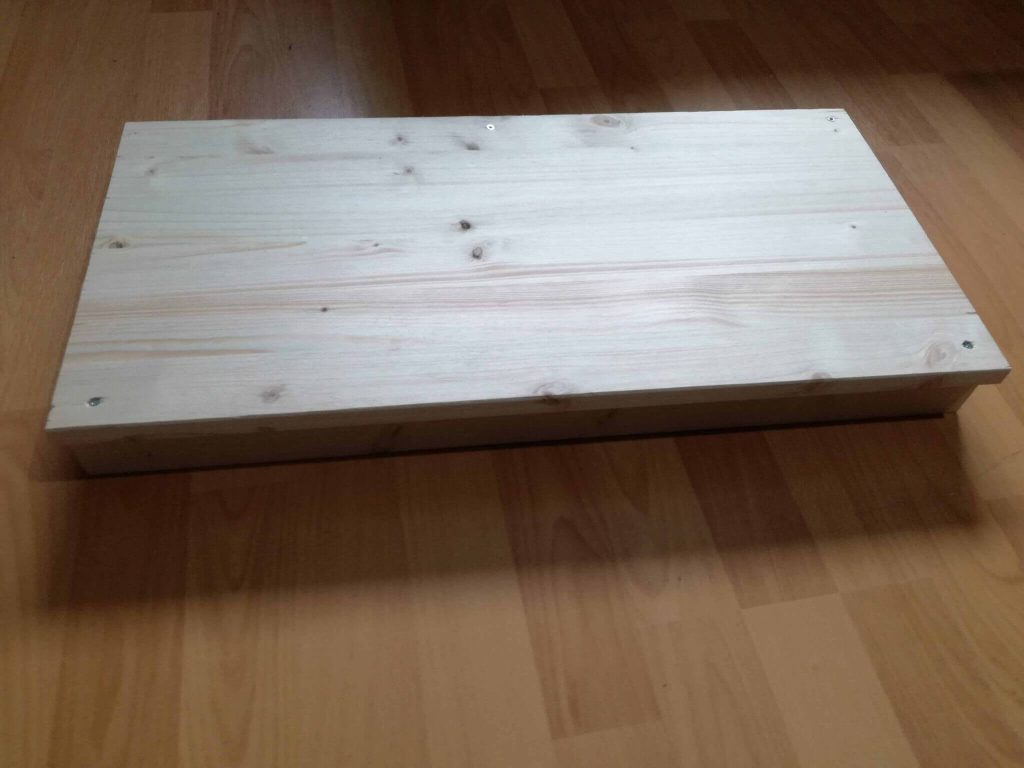
For this, we used wood glue and then 2 screws on the front panel and 3 screws on the back. And we continued by adding the large sideboards:
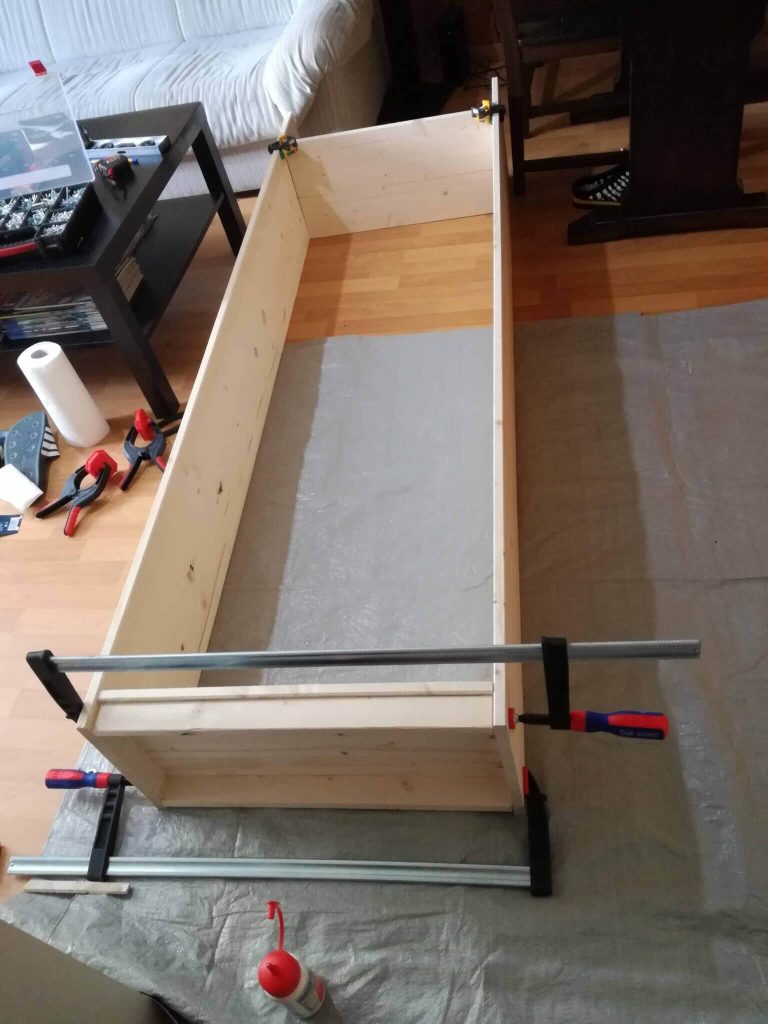
We used one of the panels inside to make sure it was straight. Once we screwed the sideboards, we also screwed the top in. I am not entirely certain this was the best way to start. Like this, we were not able to use wood glue for the inside panels. After this, we started inserting and screwing the inner panels.
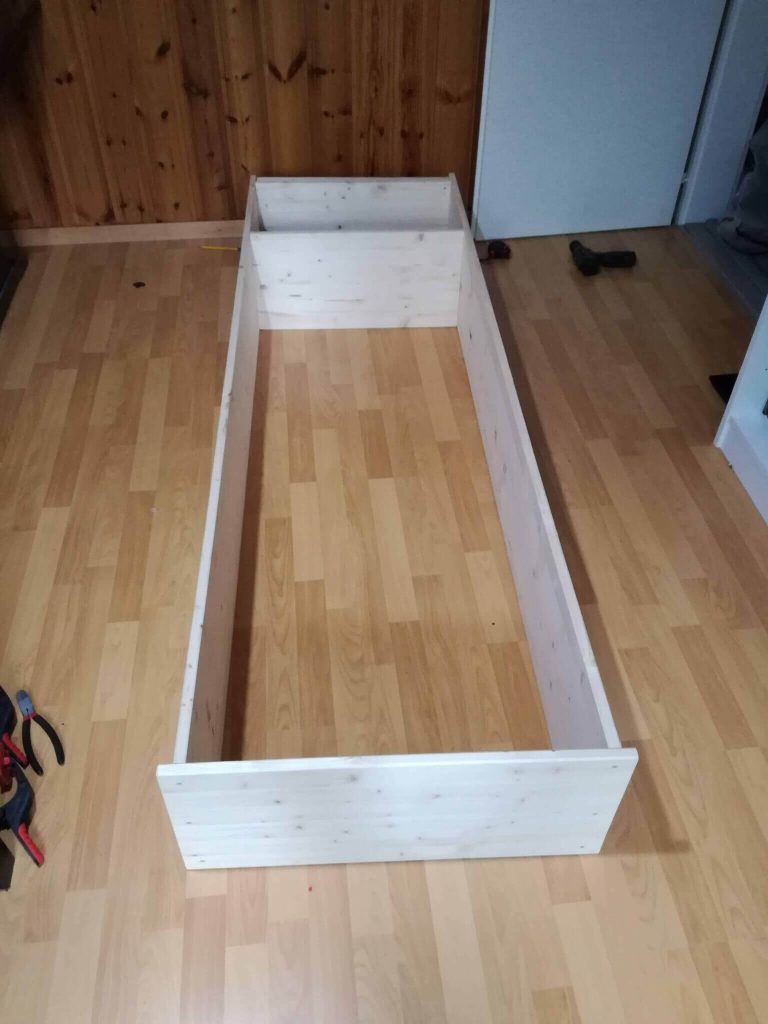
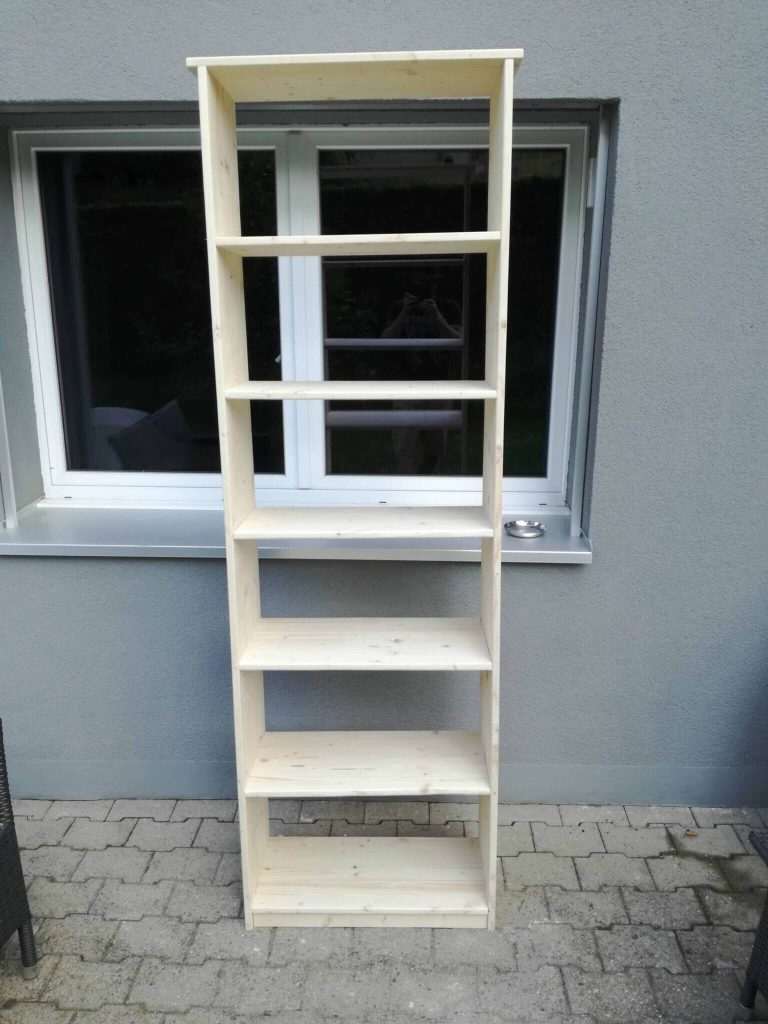
We are pretty happy with the result. But it is far from perfect. It is not entirely straight. It is mostly due to the imperfect cutting of the different boards. And some of the boards are not entirely level. But nothing much. I think for a first project, it is not bad! And most people are not quite crazy like me about 90° angles!
At this point, the next thing is to sand all the sides that were cut. I sanded in several steps with coarser grit (60) at the beginning and ended up with very fine grit (240). I almost did not sand the boards themselves since it was already done on the bought boards. Simply, I fixed a few rough patches, but nothing much.
The painting
The last step was to paint. Actually, we chose not to paint, but to use a wood stain. I believe it is more beautiful to see the wood rather than uniform paint. If you buy some nice wood, you actually do not really have to stain or paint it. We hesitated once we saw the result since it was actually quite nice. We still decided to go with it since we had bought a wood stain bottle.
In the end, we applied a single layer of wood stain to the entire bookshelf. We thought we would need two layers, but one layer was enough. Maybe I could have sanded again after the first layer and applied a second layer. With this, the wood would have been less rough. But it is quite good. Here is the result:
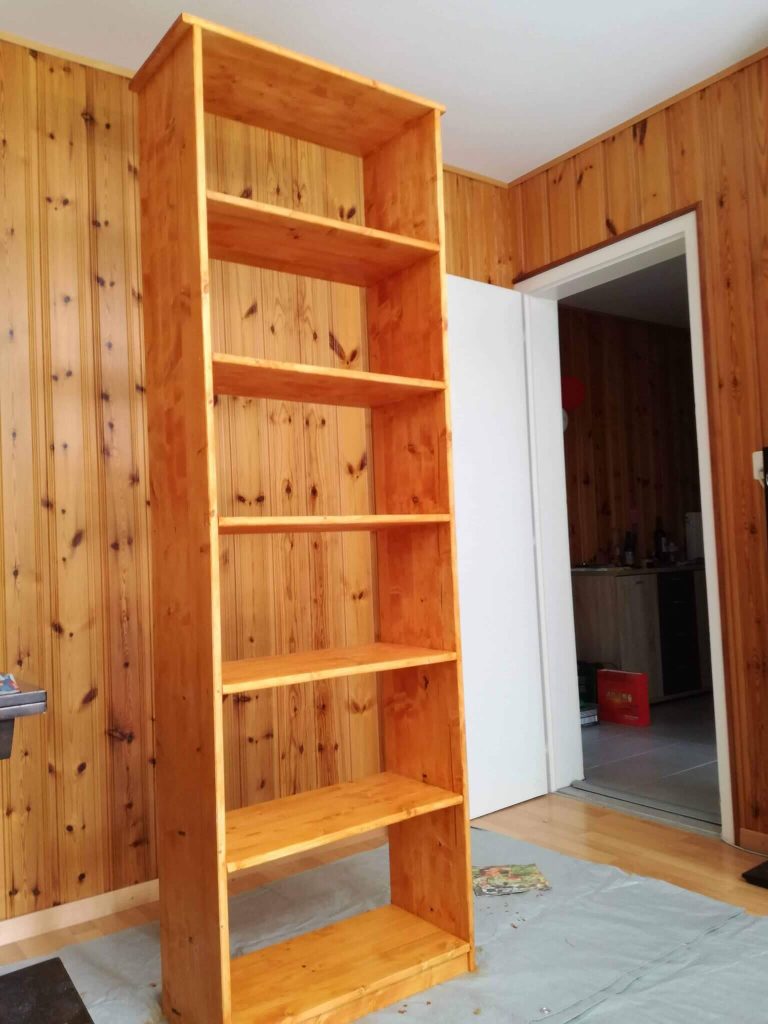
The stain we chose actually looks very good in front of our wall. It is almost the same color. This was not by design, but it is a great bonus :) It was not too difficult to make the wood stain. We simply worked together to apply the layer everywhere. It was a bit of a mess.
Here is the result after we filled it with books:
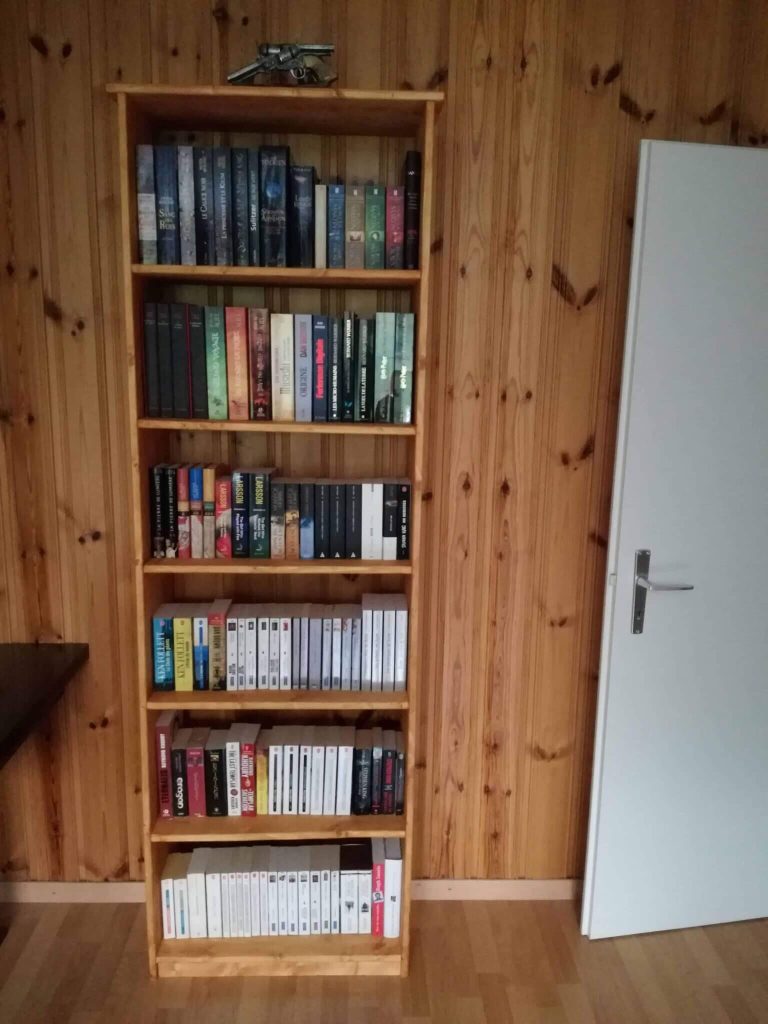
Pretty nice, right?
We are really happy about the result! For our first project, it is pretty nice.
The price
Here is all we needed for this build and the price:
- 2x 2000×300 board: 2 * 9.40 = 18.80
- 3x 1200×300 board: 3 * 5.60 = 16.80
- 2x 800×300 board: 2 * 4.00 = 8.00
- 1x wood glue: 7.40
- 1x wood stain: 14.90
- Total: 65.90
So, we had around 65 CHF of material to buy. For the wood, I do not think we can go lower. This was already the cheapest I found. For the glue, we still have 80% of the container. For our next project, we will not have to buy glue. As for the wood stain, it is really expensive.
We realized later that this was a high-quality wood stain for exterior wood. I am sure we could have saved money if we took an interior wood stain. I think it is still a pretty good result for our first project. It is possible to buy such a bookshelf new for around 100 CHF. This is still some money saved. And if you want one that looks like wood, it is more expensive.
If we compare to something used that we buy second-hand, we are around the same prices. Maybe we could have found something cheaper in used furniture. However, we have the advantage of building exactly what we want. And there is also the advantage of it being really fun.
DIY Lessons learned
The first thing I learned was that wood does not come cheap. I was really thinking that the wood would be cheaper. As you saw in the previous chapter, it was not really cheap but not really bad either. I had to check several shops for wood. And I had to learn about the different kinds of woods.
For the next project, I will still check some local shops for the price. We had two small timber factories in our village. However, I am pretty sure they do not sell very small parts of wood.
The second thing I learned was that using a circular saw is not nearly as easy as it looks. It looks like you can do a straight line very easily. But this is not as easy as this. When you can use the parallel guide, it is fine. But my guide is only for less than 20 centimeters. For the big boards, I had to cut three boards in two. It was not a really good result. I ended up losing one centimeter on each board. But each cut was better than the previous one. So at least, I am getting better :)
After I did this project, I actually learned an easy technique to cut straight lines with a circular saw. I could simply have used a piece of wood as a rule for the circular saw. This would have allowed me to cut straighter lines. There are plenty of videos on the internet to learn how to cut straight lines with a circular saw. I should just have watched them before.
It is not very easy to assemble it to make it totally straight. A few of our boards are not completely level. And the entire bookshelf is not entirely level either. We will be more careful with the calculations for our next project.
Another thing I learned is to always wear goggles when using a circular saw. I got a few wood pieces in my eye. I was lucky not to get more in my eyes. Since I did not have protection goggles, I tried without them. It was not too bad, but I did not have a lot of wood to cut. You should wear protective goggles for this. I plan to buy some good goggles and gloves for the next project.
A small thing we learned is that wood stain does not smell good. And it takes a long time for the smell to go away. We should definitely have done it outside. We will fix this for the next project if the weather is good enough. And I need to buy some paint thinner for next time to clean the brushes.
Finally, for our next project, I will try to use fewer screws to make it look nicer. There are many techniques to avoid screws when assembling furniture. We wanted to keep it simple for the first one. I especially want to try to work with pocket holes.
Conclusion of our first DIY project
In the end, we are really happy about our new wood bookshelf! It looks pretty nice and the DIY feel is really great. We learned a lot while doing this project and I enjoyed it a lot.
I already have many plans for the next projects like this. We know a lot more than before and I am pretty sure we can do better for the next one. I am also sure we will do some more mistakes, but that is quite alright. Our next project will probably be a simple shoe rack. Since my wife actually has many more than me, there is a need for some better organization.
If we were able to build this wooden bookshelf, so can you! We had no skills in building in wood before we started on this project. So there is no reason that you cannot do the same! There are tons of Youtube videos that can help you do something similar to our bookshelf.
What do you think about our project? Do you have any advice for us? Do you have any DIY projects of your own?
Download this e-book and optimize your finances and save money by using the best financial services available in Switzerland!
Download The FREE e-bookRecommended reading
- More articles about Money-Saving Tips
- More articles about Save
- Fight Food Waste with Too Good To Go
- Frugal Living in Switzerland Interview 3 – Thomas Sparkojote
- Reasons to Start a Vegetable Garden

Hey Poor Swiss!
This is fantastic! You did such a great job on your DIY!!! I’ve only refurbished furniture but I have not build from scratch. That’s some serious skills you got for a new person!
And yes, wearing goggles is a good idea when you’re working with wood. Personally for me, I also wear a mask because I don’t like inhaling that stuff. Not good for the lungs!
Overall, great job. It turned out well. Love love loveee the wood!! ❤️
Hi Panda!
Thank you very much! We are very happy as to how it turned out.
I think it’s not that complicated. It’s just a lot of work. And we had to accept, well especially I, that it was not perfect :)
But maybe I’m more skilled than I thought :P
Yes, for sanding and painting, it’s probably a good idea to wear a mask as well :)
Thanks for stopping by!
Hi!
Congratulations on the book shelf! It looks fantastic, you did a great job!
You couldn’t be more right about the fact that it’s cheaper than what you buy in a shop and that you get exactly what you need. And it very often turns out to be sturdier and durable than shop-bought. And once you need another one you can simply do it again, whereas shops may (and will!) discontinue producing furniture collections (don’t ask how I know…)
I’ve made a couple of pieces of furniture for our appartment lately. I’d like to share a couple of ideas that could be useful to other frugalists/minimalists/investors/mustachians :
* I made a big book(+otherstuff)shelf made of beech-wood from Coop (before I realized Hornbach was way cheaper). One it was done, I customized it to fit my needs even more by a adding another plank mounted on drawer-rails (from Hornbach), so that I get a “collapsible” stand-up desk, that takes up minimal space! (that goes along with going paperless ;-) ) (when collapsed, it is just pushed like a drawer right under the shelf plank at elbow height). I left a gap of about 5cm between the desk and the shelf plank, so that my laptop (screen closed) and some paper can live on the desk while it is pushed away. The nice feature is that it forces me to keep a fairly tidy desk, otherwise I couldn’t tuck it away and get out of the room comfortably (in exteded position, it bars a bit of the way out…)
* I also made a baby diapers changing table (une table à langer…) out of beech wood from Hornbach, for
about CHF 50.-. It needed to be in our own sleeping room, but again we had no free space left, so I designed
it to be able to sit stacked-up on an Ikea knee-high dresser. I also designed it so that it could be easily
converted back to a regular shelf once we don’t need to change diapers anymore. I’s very sturdy and I think
it just looks so much better than anything I’ve seen in a shop… I used furniture wax to finish it. Very nice, no drying time needed.
By the way, one of my hobbies is to develop minimalism/frugality in woodworking… I don’t use any powertool (except an occasionnal electric screwer-drill when in a tight spot or only one hand free). Hand tools, hand saws, hand planes etc can actually (and contrary to popular belief) bring you a very high degree of accuracy for a very low cluttering factor. (A flat handsaw takes very little room… I gave away my electric circular saw some year ago). Also hand tools usually make way less dust, so that I get to work inside without problem, and often times while the kids are sleeping in the room next door. And I believe handtools are an investment, good quality ones will last several lifetimes, if treated with minimal good care ;-)
(Yes you guessed I’m kind of a handtool nerd).
Hope this helps,
Cheers
Jerome
Hi,
Wow, it seems you are much more capable than me with wood :) I hope to arrive at your level after some more projects :)
I had the same problem as you with discontinuing furniture collections :S I wanted complete my desk but ended up having to get another desk as second one.
Wow, the idea of the desk / bookshelf together is awesome! I have too many computers to do something like this. But I would like to build my own desk once. I may end up using metal stand though. I will see. It’s on my list, but far from the top. And again, the idea of convertibled baby diapers table is crazy.
I personally like power tools, so I won’t consider getting minimalist with them. Even though I know it’s an error, but I will live with that ;) Congratulations on building everything with hand. This is a lot of work and probably takes a lot of practice.
My next project is a shoe rack. It will be simple but I want to learn a few new techniques. I’m waiting for next month, this month we already spent too much.
Well done for all your hard work :)
Thanks a lot for sharing your experience. I’d love to see some pictures of your projects as well :)