Reasons to Start a Vegetable Garden
| Updated: |(Disclosure: Some of the links below may be affiliate links)
When I was young, I was gardening with my father in our house. And before that, my grandfather was often taking me to his big garden. I always enjoyed it. However, since I moved into my current apartment, I never took the time to start a vegetable garden. Now that my girlfriend moved in with me, we decided it was time to start a garden again. The idea was to grow some of our own vegetables.
With our apartment, we have a large lawn, filled with grass and a few trees. We asked the owner if we could remove the grass to start a garden. Since she accepted, we started our garden.
I will present all we did with our garden in this article. Neither of us is a gardening expert. We maybe did some mistakes, but we are having fun :) And I wanted to share this project. Also, my English gardening vocabulary may not be great. So, gardening experts, do not get offended ;) I would be glad to hear all your tips!
1. Removing the grass
Here is the picture of our planned garden:
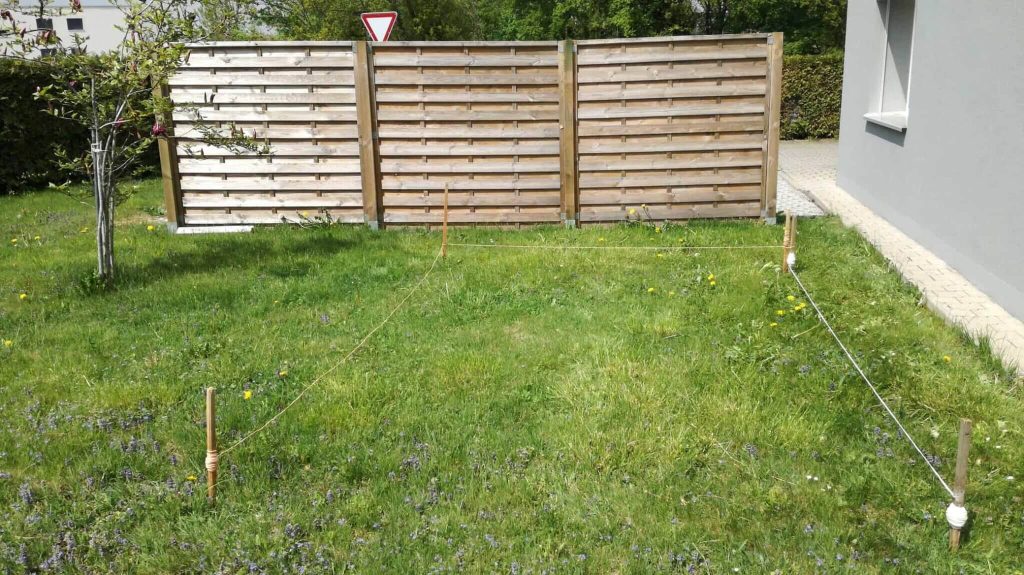
To be honest, we did not choose this exact place because it is the best. But it is a location that we do not use much. As for the size, we decided to not start too big.
The first step was to remove the grass from the chosen space. First, I mowed the grass everywhere to see better. And then, we removed the grass, square by square with a shovel. Here is what it looked like after the grass was removed:
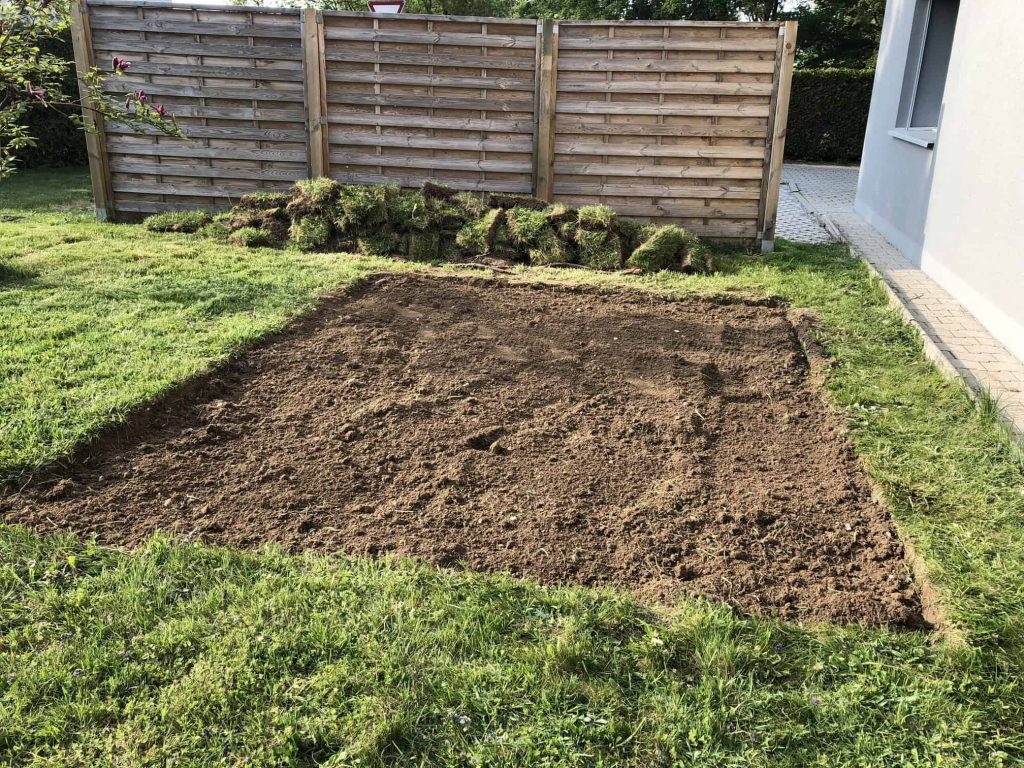
This turned out to be a lot of work. You have to cut small parts of grass and then remove it and throw it away. And rinse and repeat. Ideally, you do not want to go too deep since you will waste some earth and you do not want to go too shallow to avoid keeping all the grass-roots. You can see what we removed just behind our garden. I still have to go get rid of this.
Something we learned for this, it is better to avoid doing it in the hottest day of the month… It would have been better to start in the morning, stop in the afternoon and finish end of afternoon ;)
2. Till the soil
Now that you removed the grass, you likely have some very strong soil. You need to till it to make a good garden bed. Now, I think our soil was not an easy one. We had a lot of stones and many big roots that we had to cut with an axe. And it was very hard soil. I was thinking that a rototiller would directly go through the hard earth. Big error! The tiller was not able to go through the strong soil bed. It was too hard. Therefore, we had to use a shovel to till the hard soil. Again, you have to dig with the shovel, as deep as possible. Then turn over a shovel full of soil. Continue until you broke the entire surface of your garden.
Before you mix all this soil, you can add fertilizer. If you have a rototiller, you can use it to finish the tilling. Otherwise, you can continue with a spade. You can then finish with a rake. Next year, I do not think I will go to the trouble of borrowing a rototiller.
Here is what our garden looked like after tilling:
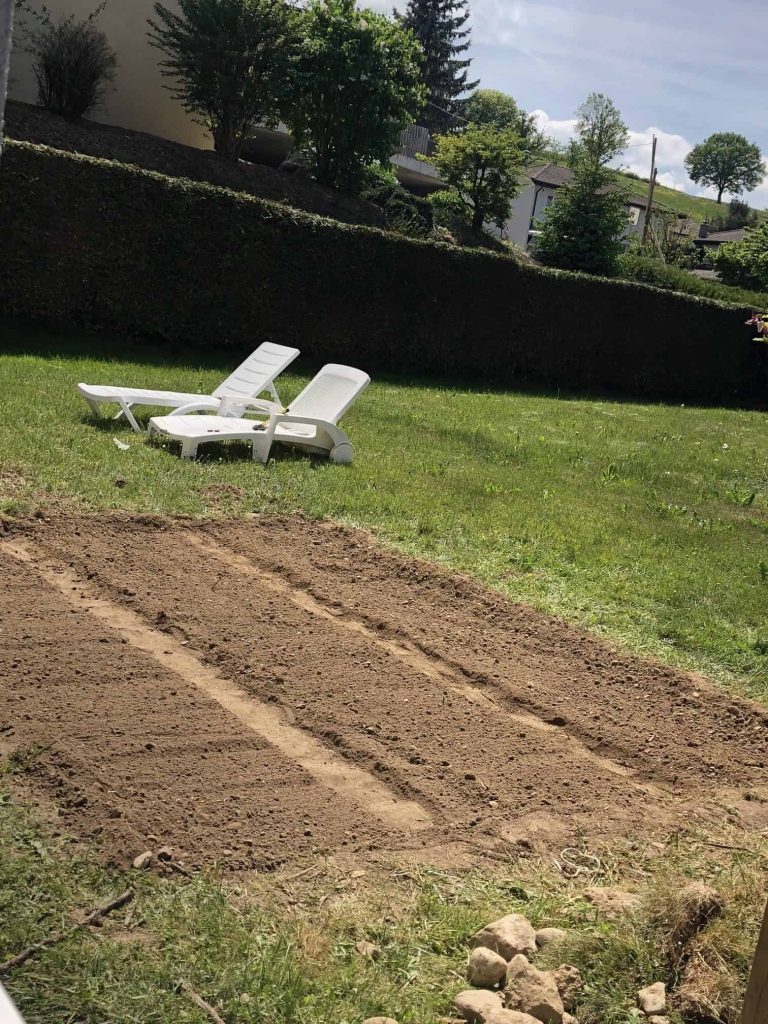
If you have a big enough garden, you can split it into several portions. Separate the portions with small paths. I simply use my feet to create the path. I use a string attached to two wooden sticks to make straight paths. At this point, your garden should be ready for planting :)
This step was also harder than I thought. It will be better next year since the soil will less strong. And we have already removed the roots and the big rocks.
3. Planting the vegetables
The last step is to plant your vegetables. Ideally, you should plan and make a list of what you are planning to plant. We did it a bit by improvising. We directly went to buy seedlings and seeds. Our estimation was quite correct since we ended up with exactly what we needed for our garden. Planting in itself is very easy. For seeds, just follow the instructions. For seedlings, simply dig a small hole, put the seedling inside and cover with fresh earth up to the base of the plant. If the weather is sunny, do not forget to water your seedlings. Here is what our garden look like after planting:
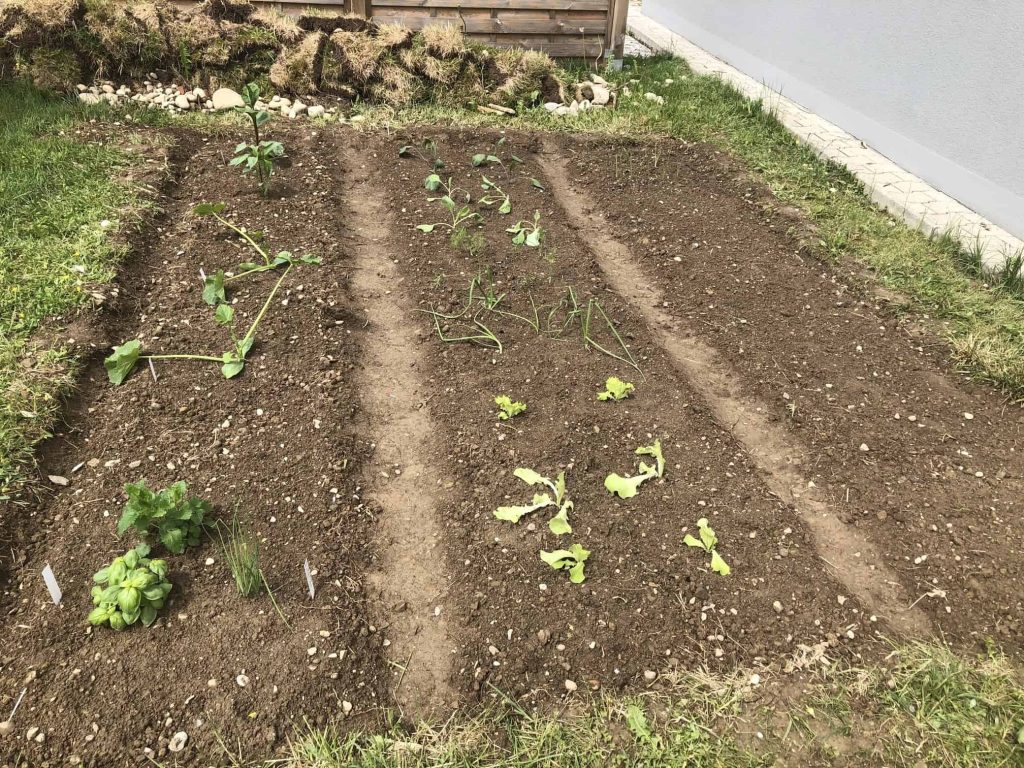
At this point, it does not look perfect. Most of the seedlings are still very small. And you can still see the pile of grass behind the garden. And the few seeds we planted did not grow yet. But we are still pretty happy about the result.
This is what we planted:
- Eggplant
- Zucchini
- Onions
- Garlic
- Vegetable onions
- Aromatic spices
- Pepper
- Cabbage (white and red)
- Peas
- Salad (3 varieties)
- Leek
Of course, the work in your garden is not over. You have to watch it for some animals. You have to weed it often. And you have to water if you do not get enough rain. A garden is a lot of work.
The cost of our garden
Since it is a finance blog, let’s discuss the cost of the garden. First, we had a few one-time costs. Indeed, I had no gardening tools. I could have borrowed some tools. But when you need the tools many times, I believe it is better to buy them. They will hopefully last several years. We spent around 50 CHF on tools.
As for plants, we bought all our seedlings and seeds in Grangeneuve which is a farming institute. I was told they had the best seedlings. I wanted to start with some good-quality seedlings for our first year. This did not turn out cheap. In total, we spent 39.25 CHF on seedlings and seeds. Mostly seedlings. Considering what we planted, I do not think our garden will get even close to profitable. For me, it does not matter too much. It is a nice hobby.
There are many ways to make it cheaper and more profitable. First, you can use more seeds and less seedlings. They are much cheaper. But they will be harder to grow. You need to start earlier and have some good warm environment and some very good soil. That takes some organization. You can read how the Frugalwoods are starting their seeds. Another thing we may do next year is to compare the prices of seedlings in different shop. I know that Landi has cheaper seedlings, but I have been told that the quality is worse. I will see for myself next year. You can also plan your garden for efficiency and profitability. Only plant vegetables that are expensive for you. But for us, we will focus on the hobby side of gardening for this year. We will see how it goes.
Conclusion
That’s it! You know all about our small vegetable garden. I am hoping the weather will turn better since this May is not very sunny yet. I am hoping we will have some nice home-made vegetables to cook this year :)
Our garden will probably not be profitable this year. However, it is a lot of fun and we both really like it. Which is the most important!
To learn more, you can read how we saved money with our garden.
Do you have any tips for our garden? Do you have a vegetable garden?

Download this e-book and optimize your finances and save money by using the best financial services available in Switzerland!
Download The FREE e-bookRecommended reading
- More articles about Money-Saving Tips
- More articles about Save
- 11 Tips to Save Money Sustainably
- How to work out at home for free in 2024
- 5 Frugal Tips from Swiss Finance Bloggers
It’s really nice !!
Thank you :)